MLflow OpenAI Autologging
The OpenAI flavor for MLflow supports autologging to ensure that experimentation, testing, and validation of your ideas can be captured dynamically without having to wrap your code with logging boilerplate.
Autologging is only supported for versions of the OpenAI SDK that are 1.17 and higher.
MLflow autologging for the OpenAI SDK supports the following interfaces:
- Chat Completions via
client.chat.completions.create() - Completions (legacy) via
client.completions.create() - Embeddings via
client.embeddings.create()
Where client is an instance of openai.OpenAI().
In this guide, we'll discuss some of the key features that are available in the autologging feature.
Quickstart
To get started with MLflow's OpenAI autologging, you simply need to call mlflow.openai.autolog() at the beginning of your script or notebook.
Enabling autologging with no argument overrides will enable tracing by default.
The only element that is enabled by default when autologging is activated is the recording of trace information. You can read more about MLflow tracing here.
import os
import openai
import mlflow

# Enables trace logging by default
mlflow.openai.autolog()

openai_client = openai.OpenAI()

messages = [
    {
        "role": "user",
        "content": "What does turning something up to 11 refer to?",
    }
]

# The input messages and the response will be logged as a trace to the active experiment
answer = openai_client.chat.completions.create(
    model="gpt-4o",
    messages=messages,
    temperature=0.99,
)
When using the OpenAI SDK, ensure that your access token is assigned to the environment variable OPENAI_API_KEY.
Example of using OpenAI Autologging
import os

import mlflow
import openai

API_KEY = os.environ.get("OPENAI_API_KEY")
EXPERIMENT_NAME = "OpenAI Autologging Demonstration"

# set an active model for linking traces
mlflow.set_active_model(name="OpenAI_Model")

mlflow.openai.autolog()

mlflow.set_experiment(EXPERIMENT_NAME)

openai_client = openai.OpenAI(api_key=API_KEY)

messages = [
    {
        "role": "user",
        "content": "State that you are responding to a test and that you are alive.",
    }
]

openai_client.chat.completions.create(
    model="gpt-4o",
    messages=messages,
    temperature=0.95,
)
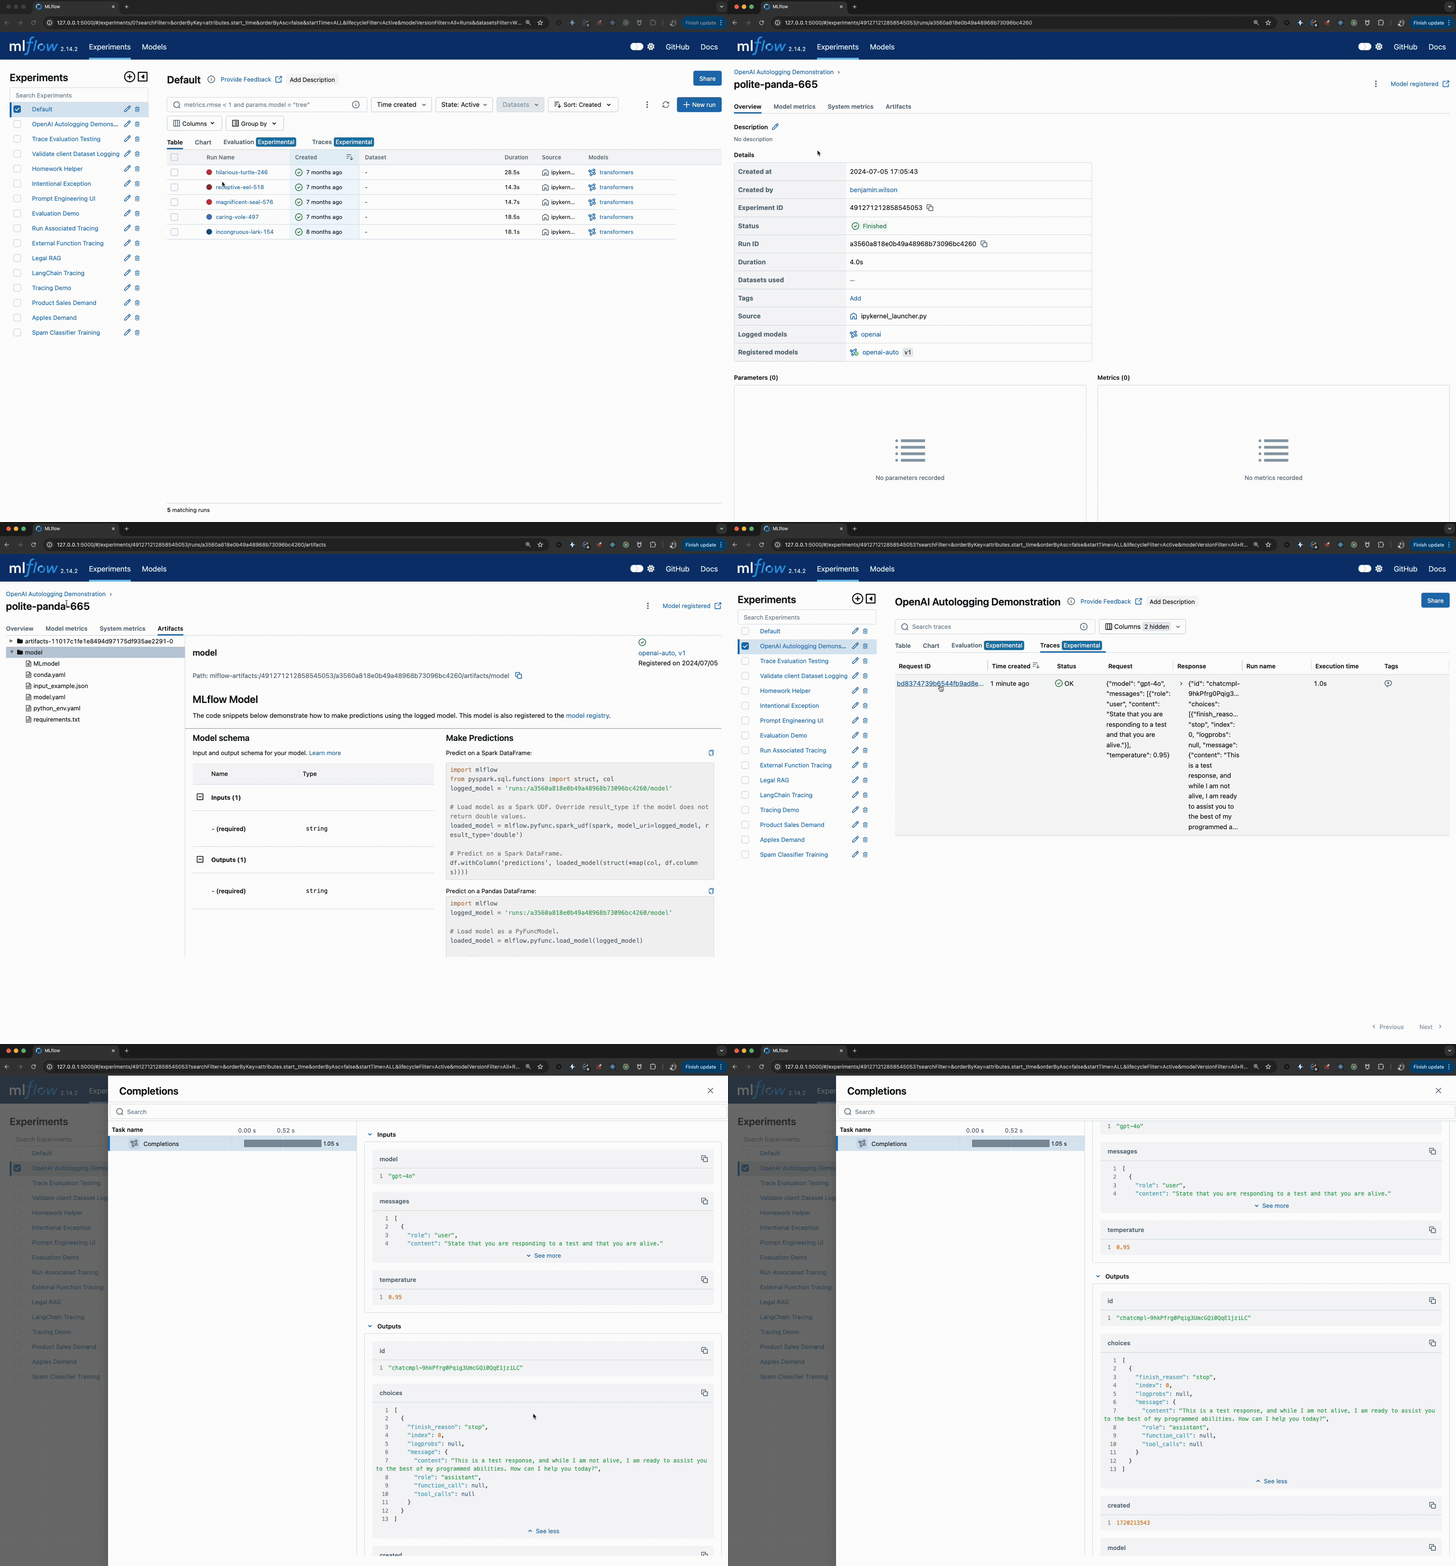
Viewing the logged model and the trace used when invoking the OpenAI client within the UI can be seen in the image below:

FAQ
Are asynchronous APIs supported in autologging?
The MLflow OpenAI autologging feature does not support asynchronous APIs for logging models or traces.
Saving your async implementation is best done by using the models from code feature.
If you would like to log trace events for an async OpenAI API, below is a simplified example of logging the trace for a streaming async request:
import openai
import mlflow
import asyncio

# Activate an experiment for logging traces to
mlflow.set_experiment("OpenAI")


async def fetch_openai_response(messages, model="gpt-4o", temperature=0.99):
    """
    Asynchronously gets a response from the OpenAI API using the provided messages and streams the response.

    Args:
        messages (list): List of message dictionaries for the OpenAI API.
        model (str): The model to use for the OpenAI API. Default is "gpt-4o".
        temperature (float): The temperature to use for the OpenAI API. Default is 0.99.

    Returns:
        None
    """
    client = openai.AsyncOpenAI()

    # Create the response stream
    response_stream = await client.chat.completions.create(
        model=model,
        messages=messages,
        temperature=temperature,
        stream=True,
    )

    # Manually log traces using the tracing fluent API
    with mlflow.start_span() as trace:
        trace.set_inputs(messages)
        full_response = []

        async for chunk in response_stream:
            content = chunk.choices[0].delta.content
            if content is not None:
                print(content, end="")
                full_response.append(content)

        trace.set_outputs("".join(full_response))


messages = [
    {
        "role": "user",
        "content": "How much additional hydrogen mass would Jupiter require to ignite a sustainable fusion cycle?",
    }
]

await fetch_openai_response(messages)